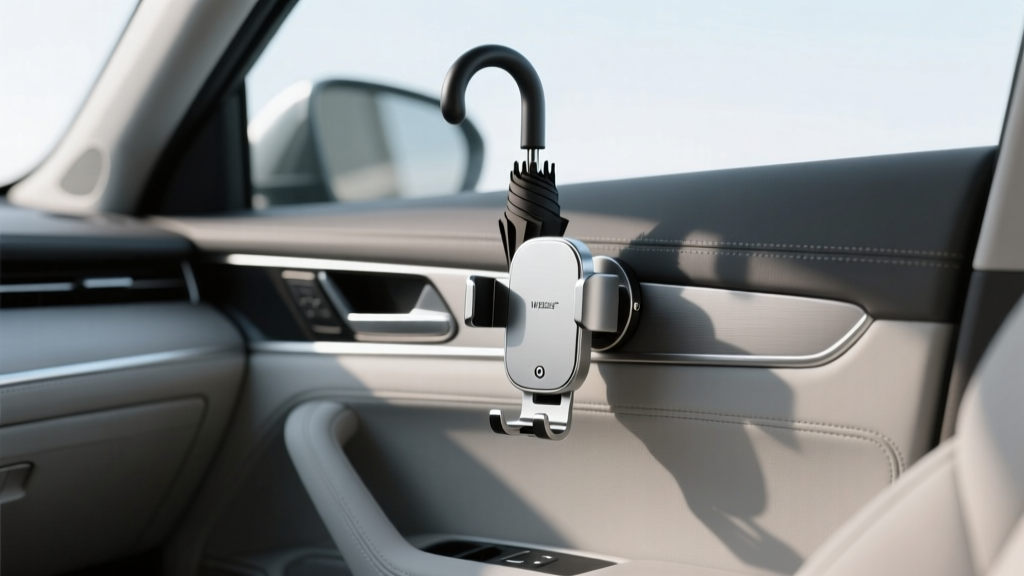
Umbrella Holder Mount Installation: Step-by-Step (2026)
A wet umbrella rolling around your cabin is one of those small annoyances that can snowball into bigger problems. Water drips onto carpets, floor mats get musty, and the umbrella itself becomes a projectile when you brake hard. If you?ve ever fished a soaked umbrella from under the passenger seat or found mildew along the door sill, you already know why an umbrella holder mount is more than a ?nice-to-have? car interior accessory.
The good news: installing an umbrella holder in your vehicle is usually a simple weekend task that makes daily driving cleaner, safer, and more organized. Whether you want a discreet mount on the door panel, a seatback umbrella holder for rear passengers, or a trunk-mounted option for larger umbrellas, the key is choosing the right style and installing it in a way that won?t damage trim, airbags, or upholstery.
This guide walks you through selecting the best umbrella holder mount for your vehicle, gathering tools, and installing it step-by-step. You?ll also get real-world placement tips, product-style comparisons, common mistakes to avoid, and a quick FAQ at the end.
What Is an Umbrella Holder Mount (and Why Install One)?
An umbrella holder mount is a dedicated storage solution designed to keep a compact or full-size umbrella secured inside your car. Most include a bracket, sleeve, or clip system that attaches to an interior surface. Better designs also handle water management by using a waterproof liner, drain slot, or removable drip tray.
Key benefits for car owners
- Protects your interior: Reduces water on carpets, leather, and fabric upholstery.
- Improves safety: Prevents umbrellas from sliding under pedals or becoming a loose object during sudden stops.
- Creates consistent organization: Everyone in the car knows where the umbrella goes.
- Helps control odor: Wet umbrellas can cause lingering damp smells?especially in closed cabins.
Choosing the Right Umbrella Holder Mount for Your Vehicle
Not every umbrella holder works with every cabin layout. Before you buy, think about your umbrella type, passenger needs, and where you can mount something without interfering with moving parts or airbags.
Common umbrella holder styles (with pros and cons)
1) Door-mounted umbrella holder (clip or pocket)
- Best for: Daily drivers, commuters, compact umbrellas
- Pros: Easy access when exiting; often fits naturally in door storage areas
- Cons: Can interfere with window controls or door pockets if poorly sized
2) Seatback umbrella holder (strap-on or hook-on)
- Best for: Families, rideshare drivers, rear passenger convenience
- Pros: Keeps umbrellas off the floor; no adhesives needed with strap designs
- Cons: Must avoid blocking seatback pockets or rear HVAC vents
3) Center console or footwell-mounted holder
- Best for: Solo commuters, small cabins
- Pros: Close to driver access; can be very secure
- Cons: Risk of interference with pedals or seat rails if placed incorrectly
4) Trunk/cargo-area umbrella mount
- Best for: Full-size umbrellas, SUVs/hatchbacks, golf umbrellas
- Pros: Keeps wet items out of passenger area; more space for larger umbrellas
- Cons: Less convenient when you?re stepping out into rain
Mounting methods you?ll see
- 3M-style automotive adhesive pads: Clean look; strong if installed correctly.
- Screws: Most secure; best for cargo area panels; requires drilling and careful planning.
- Straps/buckles: Great for seatbacks and headrests; easy to remove; no residue.
- Clips/hooks: Quick install; strength varies; can rattle if loose.
Quick fitment checklist
- Will it fit your umbrella?s length and handle shape?
- Does it include a waterproof liner or drip containment?
- Can you mount it without blocking airbags (A-pillar, seat-mounted airbags) or seatbelt paths?
- Will passengers bump it with knees or shoes?
Tools and Materials to Prep Before Installation
Most installations take 10?30 minutes, but preparation is what makes the mount stay put for months (not days).
Basic supplies
- Microfiber cloths
- Isopropyl alcohol (70% or higher) for surface prep
- Trim-safe interior cleaner (optional, but helpful)
- Measuring tape or ruler
- Painters tape (for temporary positioning marks)
- Plastic trim tool (if routing straps or tucking edges)
If your mount uses screws
- Small drill/driver
- Appropriate drill bit (pilot hole size per hardware)
- Short screws (avoid going too deep into hidden wiring)
- Optional: rivnuts or well nuts for stronger mounting in thin panels
If your mount uses adhesive
- Adhesion promoter (optional, useful in hot/cold climates)
- Hair dryer or heat gun on low (to warm adhesive in cold weather)
Best Places to Mount an Umbrella Holder (Real-World Examples)
Where you mount the holder is as important as how you mount it. Here are practical placements that work in many vehicles.
Front passenger footwell side panel (console side)
- Why it works: Out of the driver?s pedal area; easy access from front seats.
- Watch for: Passenger knees, glovebox opening clearance.
Rear of center console (rear passenger area)
- Why it works: Great for families; kids can store umbrellas after school.
- Watch for: Rear vents/USB ports; keep the umbrella from blocking airflow.
Door pocket zone (lower door panel)
- Why it works: Natural ?vertical storage? area on many cars.
- Watch for: Window switches, speaker grilles, and side airbags in doors (varies by vehicle).
Cargo area side panel (SUV/hatchback)
- Why it works: Ideal for long umbrellas; keeps wet gear away from seats.
- Watch for: Access panels, tie-down points, and 12V outlets.
Step-by-Step Umbrella Holder Mount Installation (By Mount Type)
Below are installation walkthroughs for the most common types. If your product includes a manufacturer template or specific cure time, follow that first?then use these steps to avoid the usual pitfalls.
Option A: Installing an Adhesive-Mounted Umbrella Holder
-
Test-fit the umbrella and choose the orientation.
Hold the umbrella in the intended spot and simulate entry/exit. Make sure the handle won?t jab a passenger?s leg and the tip won?t rub carpet edges. -
Mark placement with painters tape.
Use tape to outline the mount position so you can align it perfectly on the first try. -
Clean the surface thoroughly.
Wipe with interior cleaner if needed, then wipe with isopropyl alcohol. Let it fully dry. Adhesive fails most often because of silicone dressings or leftover grime. -
Warm the adhesive if conditions are cold.
If your garage is below ~60�F (15�C), warm the pad and mounting surface slightly with a hair dryer. This helps the adhesive ?wet out? and bond. -
Apply the mount with firm pressure.
Peel backing, align to your tape marks, then press hard for 30?60 seconds. Focus pressure on the adhesive area, not flimsy plastic edges. -
Respect cure time before loading weight.
Many automotive adhesives reach full strength after 24?72 hours. Avoid inserting a heavy, wet umbrella right away. If you need to use it sooner, use a lightweight compact umbrella first.
Option B: Installing a Strap-On Seatback Umbrella Holder
-
Choose a seatback that won?t interfere with airbags.
Avoid routing straps near side-airbag seams (often labeled ?SRS AIRBAG? on seat sides). Seatback organizers should sit on the back panel, not wrap around airbag areas. -
Set the height.
Aim for an umbrella position where the tip won?t touch the floor aggressively over bumps, and the handle is reachable by rear passengers. -
Route straps cleanly.
Use a trim tool to tuck straps neatly if needed, but don?t force them behind hard plastic panels that could pinch or fray the webbing. -
Tighten and check for seat movement.
Slide the seat forward/back and recline it to confirm the holder doesn?t snag on rails or bind the mechanism. -
Load the umbrella and test for rattles.
If it rattles, add a small adhesive felt pad where plastic meets plastic, or tighten the strap further.
Option C: Installing a Screw-Mounted Holder (Cargo Area Recommended)
-
Inspect behind the panel before drilling.
Cargo panels can hide wiring for tail lights, 12V sockets, and sensors. If possible, remove the panel or use an inspection mirror and flashlight. -
Measure twice, mark once.
Use painters tape for marks; ensure the umbrella won?t interfere with cargo covers, spare tire access, or folding seats. -
Drill a pilot hole.
Start small. This reduces the chance of cracking trim and helps the screw bite straight. -
Fasten the mount gently.
Over-tightening can strip plastic or deform the mount. Snug is usually enough. -
Add a moisture strategy.
If the mount doesn?t include a waterproof sleeve, consider adding a removable drip tray or a rubberized liner under it to protect carpeted cargo panels.
Product Recommendations: What to Look For (and What to Skip)
Rather than chasing a specific brand, focus on design features that match real usage. Umbrella holders range from simple clips to sealed sleeves with drainage.
Best features for everyday driving
- Waterproof inner sleeve: Keeps moisture contained and makes cleaning easy.
- Drain plug or removable bottom cup: Lets you empty collected water without removing the whole mount.
- Quiet materials: Rubberized grips or felt contact points reduce rattles.
- Adjustable diameter: Works with different umbrella handles.
- Heat-resistant adhesive: If you park outside in summer, cheap pads can soften and slide.
Quick comparisons (choose your lane)
- Adhesive pocket holders: Clean look and easy access; best for compact umbrellas; requires proper surface prep.
- Strap-on holders: Most flexible and removable; great for rentals/leases and families.
- Hard-shell sleeves: Best water control; slightly bulkier; often better in SUVs and larger sedans.
Common Mistakes to Avoid
- Mounting near airbag zones: Avoid A-pillars, seat side seams labeled SRS, and areas where airbags deploy.
- Skipping alcohol wipe-down: Interior dressings and skin oils are adhesive killers.
- Placing it where umbrellas drip onto electronics: Keep wet umbrellas away from window switches, USB ports, and 12V outlets.
- Blocking seat tracks or pedals: Never mount in the driver footwell or near moving rails.
- Loading a heavy wet umbrella immediately: Give adhesive time to cure so the mount doesn?t peel off later.
- Ignoring drainage: A holder that ?stores? water will eventually smell. Choose one with a liner or commit to emptying it.
Practical Tips for Long-Term Use
- Keep a microfiber towel nearby: A quick wipe before storing reduces pooled water.
- Empty and rinse monthly: If your holder has a cup or sleeve, rinse it to prevent mildew.
- Use a compact umbrella for cabin mounts: Full-size umbrellas are better suited to cargo areas to avoid bumps and rattles.
- Add a small desiccant pack: In humid climates, a small moisture absorber in the holder area helps keep odors down (replace regularly).
FAQ: Umbrella Holder Mount Installation
Will an adhesive umbrella holder damage my interior trim?
If installed on a clean, smooth surface and removed carefully, adhesive mounts usually don?t cause permanent damage. The risk goes up if you mount on soft-touch coatings, textured rubberized panels, or aged plastic. If you?re unsure, test the adhesive on an inconspicuous spot or choose a strap-on design.
Where should I avoid mounting an umbrella holder?
Avoid driver footwell areas, seatbelt paths, and any panel associated with airbags (A-pillars, seat side seams marked SRS, and certain door areas depending on the vehicle). Also avoid spots where water could drip directly onto switches or charging ports.
What?s the best umbrella holder for a leased vehicle?
A strap-on seatback umbrella holder is usually the safest choice because it doesn?t require drilling and leaves minimal residue. If you prefer adhesive, choose a mount with high-quality automotive tape and place it on a hard plastic surface rather than soft-touch trim.
How do I stop my umbrella holder from rattling?
First, confirm the mount is tight and properly seated. If it?s a clip-style design, add thin adhesive felt pads at contact points. For sleeves, use a small rubber insert or adjustable strap to keep the umbrella snug.
Can I mount an umbrella holder in the trunk and still keep the umbrella dry?
You can keep the trunk clean, but the umbrella will still be wet when stored. Look for a holder with a waterproof sleeve or add a removable drip tray. If you drive often in rainy conditions, a sealed sleeve is the easiest way to avoid damp cargo carpet.
Wrap-Up: Your Next Steps
Pick a mounting location that makes sense for how you use your car, choose a holder style that matches your umbrella size, and take surface prep seriously?especially for adhesive mounts. Once installed, do a quick real-world test: open/close doors, slide seats, check passenger legroom, and drive around the block to listen for rattles. A few minutes of checking now prevents weeks of annoyance later.
If you?re ready to keep rain gear under control, start by measuring your umbrella and scouting two possible mounting spots, then choose the mount style that fits your vehicle and lifestyle. For more practical car interior upgrades and step-by-step installs, explore the latest guides on carinteriormix.com.